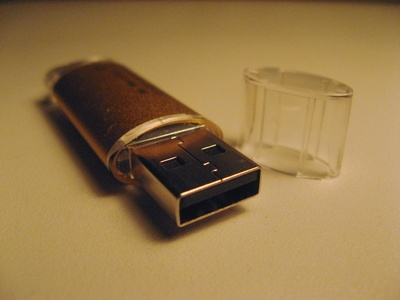
Once i visited one of my friend’s house. He had some pics of school time in his laptop. So i inserted my usb drive in his laptop, and tried to copy those photos into my usb. Whops! I see a error message. It says “The disk is write-protected”. So now what to do? Will that be permanent? Obviously not. You can remove write protection from USB drive by using some commands. We will use windows cmd console for typing these commands. So lets start.
How To Remove Write Protection From USB drive??
First open cmd by pressing WIN+R(Run) and then type cmd and press enter.
Now you will see something like below (CMD console). Type diskpartand press enter. Like i have done.
Diskpart will start now. Now type list diskand press enter. Refer image below.
Now it will list the disks connected. You have to select disk 1.
Type select disk 1 and press enter.
Now we will remove write protection from usb drive.
type attributes disk clear readonlyand press enter.
Sometimes after you have executed the command, you have to remove and reinsert the usb, to remove write protection successfully.
Now you have full access over your usb drive. You can copy,delete and modify all of its content,
In this way you have successfully remove write protection from USB drive. So its basically few commands. If you do it in the right way as mentioned above, then this method will definitely work out for you.
If you have any doubts regarding this method, then do post in the comment section below. I will be happy to help.
Nowadays many of us are using Wifi router in our home, as it requires no wire connection and its a bit comfy to use. But have you ever imagined, that your neighbor or someone around you may also be using your wifi connection slowing down your speed. Ofcourse we secure it using a password. But by any means, anyone gets your password, he may use it. So if you want to check if someone is using your wifi, i have a amazing and very easy method to detect.
Now install it. After you have successfully installed, press the SCAN NOW button. It will scan your network for devices that are currently connected to it.
After the scanning completes, you will hear a voice of lady saying “Unknown computer found”
Now it will display a list of devices, which are currently connected to your network.
Those devices you recognize as harmless, you can change them to known from unknown (then press save changes) and also name them for further reference.
Now whenever any other device gets connected to your network, the software will automatically inform you.
If you find that the device is unwanted, and some other person whom you don’t want to allow is using the network, then there is option to block that device with reference to its mac address. Or simply you can change your password and increase security.
So using this software, you can check if someone is using your wifi and block unknown devices.
Once you have installed this software, then you can sit without any fear as it will be guarding your wifi network. If you have any doubts regarding the method, do post in the comment section below. Your queries are welcomed.
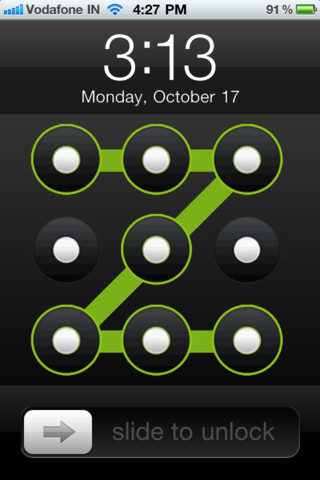
Android has really become one of the popular OS in mobile phones. It is still alive, because of amazing apps it has in playstore, and some of its eyecatching features. Now if you see the most used locking system in Android Phone, is Pattern locking. Today no one bother’s typing their passwords again and again, to unlock their phone’s. And remembering the passwords is also a headache. Instead today people just swipe their fingers on the screen and make a pattern to unlock. Its easy and also looks COOL. So if you really like that style, then here’s a good news for you. Now you can unlock your PC in pattern style, same as in android, just you have to move the mouse over those dots.
Requirements
You need to have a Windows Operating System (any version xp,Vista,7,8)
How to Unlock your PC in pattern style???
First we need a tool named EUSING MAZE lock. Download it from here (Note: Its Free, no need to register, but if you want you can donate)
Now install the tool and run it.
First time you need to fix a pattern for unlocking(Default pattern is Z). Also backup the pattern using the settings.
You can configure the software as per requirements. To do so, right click on the icon in the task bar.
Now click configure, draw the pattern for security check and see the settings box open.
Now you can adjust settings as per your requirements. Always lock keyboard in the settings.
Just click ok to save changes. And you are ready. Now whenever you want to unlock your PC, just draw the pattern.
So isn’t it cool??Just do this in front of your friends and see them surprised. Quickly grab the tool and make your security more tight with a cool unlocking trick.
If you have any doubts regarding this tutorial, please feel free to post them in the comment section below. I would be happy to Help out your queries.
Torrent is also known as Bit-Torrent. It was developed by a programmer named Bram Cohen. So before directly starting about how torrent downloading works, we will see how various downloading methods work. Then we will also see how to increase the torrent downloading speed(scroll to last).
Client-Server Method :
We all use this type of method to download various files over the net. In this type,clients are those who are downloading or receiving the files, while server are those computers that provide you that file. Now while downloading a file, client requests the server for that specific file, and the server responds back by providing client with the file needed. Now this data transmission is handled by the network i.e. Internet. Also there are various protocols(certain rules) associated with downloading like FTP(file transfer protocol) or HTTP (hypertext transfer protocol).
The speed of your downloading is affected by various factors like the load or demand on the server for the file. The more is the load, less is the speed that you get for downloading. That explains, why you get more download speed at the night as compared to day. Also this method is used when you surf the internet. You write a name of website in address bar, which means you are requesting for a webpage with that name, and the server replies back with the page. In this the Web browser is the client or the medium to access files over the internet.
Peer to Peer Method :
In this method of file sharing, the files are on normal computers, and not servers. These computers are called Peers. So you need some software (like utorrent) and not browser to access the files.
So when you run these software’s, they request for the file needed, and find the no. of sources available for the file. The sources are other computers that are running peer-to-peer software which are currently connected to the internet. So in this way, the load is distributed.
But the problem in this type of sharing method is that, people download the file required, and just stops the software from sharing files to others. This is called Leeching.
Now the million dollar question..
How torrent downloading Works ???
Bit-Torrent is based on peer-to-peer sharing with some major differences. It transfers some work load to a Server called asTracker. Now when you request for a file using the software(eg. utorrent), the software communicates with tracker, and the tracker informs it about various sources of the file available.Now there are two major types of sources:
Those who have completed downloading the file and are uploading are called seeders and the process is called seeding.
Others who are still downloading the file can also serve as seeders.
The client software which we using, breaks the big file into small parts. Now client software trade for parts with other computers, which we need and provides the parts of the file that others need. In this way we can download multiple parts of file from other swarms (computer connected in the process of sending and receiving).
One more concept i would like to share. The file that you download from a bit torrent site is a .torrent file. It is very small and acts as a pointer to its sources and gives information to the client software about the file.
How to increase the torrent downloading speed ???
Also Bit-torrent has a rule of tit-for-tat. That means, the more you give, the more you will receive. This implies that, if you share or upload files to others, you will get more speed for download. This solves the problem of leeching. You can just start seeding after you have completed the download. This will increase your tit-for-tat rating in bit-torrent and provide you with good speed in the Future. So instead of searching for other articles on how to increase torrent download speed, just start uploading/seeding and you will definitely find an increase in your speed.
Also select a torrent having high number of seeds as compared to peers. It will help you achieve great speed.
If you have any questions or doubts regarding this article, then do post it in the comment section below. I would be happy to help.
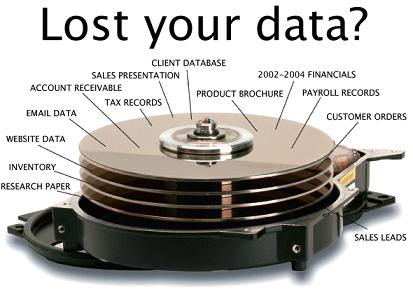
Once I accidentally deleted one Partition of my cousin’s PC. It contained a total Data of Around 120 Gb. So, is that all the Data from the partition gone permanently with just Few clicks?? The Answer is no. When we delete the partition or the Data, only the name assigned to it is deleted, while our data still exists on HardDrive. It gets permanently deleted only when you add another data, and the old one gets replaced. So today we will see, how to recover data from deleted partition.
First things first. I will recommend that, after deleting or formatting partition accidentally, don’t copy any another data in the partition and also don’t Format it. Next thing you have to do is, you will have to arrange space equivalent to that you have lost. You can either free up another partition or arrange a external hard disk. The reason behind this is that, you can’t recover data in the same space from where you lost it.
Believe me this Method really works. I myself have recovered 120Gb of Data as it is, otherwise my cousin would have killed me. You can rely on this software. So this method will definitely provide ans to the question, how to recover data from deleted partition. If you have any queries regarding the above method, feel free to comment. Also share your experience with us.
In today’s World Internet has became one of the basic need. So to share Internet Connection, Wifi is the best medium. Usually, we can find Wifi hotspots at many places nowdays. But have you ever thought that, you can create your own Wifi hotspot and connect various devices to it. Today I am going to share the best method to create wifi hotspot in laptop or PC. Many people also require to use their internet connection of pc/laptop in their mobiles, so this method would work for them.
Requirements:
A Laptop or PC(with a external wifi adapter)
Internet connection to be shared (Wired connection,Cable net)
Operating System Windows xp(sp3),or Windows Vista,or Windows 7,or Windows 8
How to create wifi hotspot in laptop or pc ??
We will use a Software named Connectify. It is a Free Tool. You can Download it from the Link below. Click here to download
After downloading install it and then Launch it from Start Menu.
After Starting, you can see the its icon in Task bar (right side bottom corner).
Now just click on it and you will see a panel. In that, you can change the settings of the hotspot.
Now Just Enter the name of your Hotspot(1). Then Enter Password for your wifi hotspot(2).
Now select the Network (wired connection) which you want to share using Wifi (3).
In the image above I have shared my cable net(Realtek PCIeFE Family Controller).
(In the image above I have shared my cable net(Realtek PCIeFE Family Controller)).
Let the security be set to WPA2 and then Click on Start Hotspot.
After a few seconds you will see that your Wifi Hotspot is created and you can connect your other devices like mobile to it. Just Enter the password and connect to your own Wifi hotspot.
You can also check, who is currently connected to the Wifi hotspot like below.
This was the Easiest and the Best method to Create wifi hotspot in Laptop or PC. Now this was for the trial version. If you purchase the full version,you can share Data over Wifi Connecition.
If you Find any problem with the above method, DO COMMENT below or mail me using contact form.
Skype is a software that is mostly used for free calling between computers. It is famous for free Pc to Pc calling. But when you try to connect call from PC to mobile or some landline number, it will Cost you as per the country. But this season, skype has come up with a offer declared in a TWEET. Now you can make free calls with skype for a month to specific countries. In addition to calls, you can also try video calling with a group of maximum 10 friends, 5 recommended.
List of countries to which you can make Free calls
NOTE: This not a illegal trick or Rumour. The offer is clearly announced by skype in this link.
How to make free calls with skype for a month??
First go to this LINK and click on the option ‘Claim your free month’.
Then sign in if you already have a skype account or sign up for a new one.
Now enter your credit/debit card or paypal detail (You will not be charged). You can see the billing details are INR Rs0.00 while making payment.
Once your premium services are activated by skype(Check your email). You will receive a email that your trial is started.
Now CANCEL the recurring Subscription immediately(Recommended) or else you can cancel it within 27 DAYS of your subscription. If you don’t cancel within 27 days then you will be Charged.
After you cancel the subscription, you should receive a email regarding it, like in the image below.
Once you cancel the subscription, you can still use the premium services i.e. calling free for 30 days.
So in this way you can call FREE for 1 MONTH, and even do VIDEO calling with max 10 people.
You can also check SKYPE fair usage policy for VIDEO calling on this LINK
If you have any doubts regarding this tutorial, then do post it in the comment section below. I would be happy to help you.
Windows 8 is becoming familiar to the world slowly. The new Wiindow’s Store has some amazing apps published. Also there are some interesting games like 3D Pinball Fx, Jetpack joyride etc.. But the Game today we will be discussing, has motion gaming involved. We have seen motion gaming in Xbox Kinect, but it involves its own console and hardware. But now you can play motion game in windows 8, and it uses only Webcam and you can play it on laptop, pc , tablet having Windows 8 OS.
How to play motion game in Windows 8 using webcam?
The game’s name is Ball Strike. Obviously it can’t be compared to the motion gaming of Xbox, but its a very basic game and still fun. You can search it on the Store with the name BallStrike or you can visit the link below.
Rather than being only a Game, its a Health fitness Game to burn your calories. The game comes with a few levels to try and then if you like it, you can buy the Full version. The amazing thing about this app is, it uses only Webcam as hardware which is very common. So everyone having webcam can try it. Also it shows the number of calories burned. So install the game and give a try yourself.
If you have any doubts regarding this game, feel free to post in the comment section below. I would be happy to solve your doubts.
Hello friends.. Today we will learn to customize our boring desktop. Also we will make the task of multitasking even better. We will use six desktop in windows simultaneously. You can set different icons and wallpapers on each desktop. This works with XP, windows vista, windows 7, windows 8. So let’s get started without much boring talks.
How to use six desktops in windows???
First we will need a tool/software. For this i will use a utility name CubeDesktop.
After downloading simply install the software on your PC/Laptop.
Now launch the software from desktop icon. It will initialize and then start.
You will now see the software running in your tray.
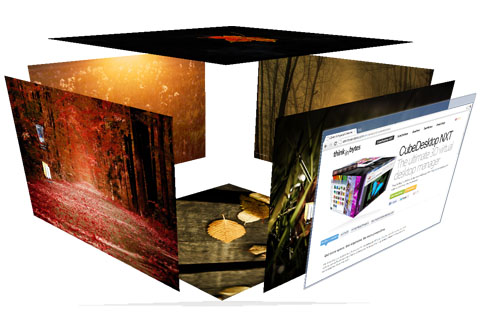
Now there are some shortcut keys through which you can see all the desktops in cube, carousel, explorer etc shape. We will see one by one.
3D-Cube – Press F11
3D CUBE
3D desktop explorer- Press F7
3D desktop explorer
3D desktop Flip-Press F8
3D desktop flip
3D desktop carousel
3D desktop carousel
You can also zoom in and zoom out using down and up keys. Also you can shift desktop using left and right arrow keys.
In the above images i have used the same wallpaper for all desktops. But you can also use different wallpapers for each desktop. Also there are many options through which you can configure and enhance your experience.
You can select eight hot corners which will do the task, which you will assign.
Just right click on the cube icon in the system tray, then select show options.
I hope you will try this out and you will find it interesting. Also they have advanced version of this software, which you can download it from HERE and give it a try yourself.
If you have any doubts regarding this, then do post it in the comment section below.
Nowadays computer has became one of the primary need of human. Everybody uses computer to surf the net, watch movies, to complete the office work blah blah. So you may also be knowing that, due to prolonged exposure of eyes to the computer screen affects your eyes badly. Now a software named F.lux protects eyes by adjusting brightness.
Now the solution which is used by many people is that, they use a eye protection shield. Imagine if you could replace the work of shield by a software, how simple and cheap it would be to protect your eyes.
It’s even possible that you’re staying up too late because of your computer. You could use f.lux because it makes you sleep better, or you could just use it just because it makes your computer look better. So this software will just remove the restrictions of using PC for long time, and will also help you in maintaining good vision. F.lux tool protects eyes while using pc or browsing on internet.
This software comes for Windows,mac, Linux, iphone/ipad.
How F.lux protects eyes??
The software sets brightness of the screen according to the time of day, warm at night and like sunlight during the day. So if its morning, then you will see bright screen. And as the day sets, your screen will start loosing brightness and adjust it to the level where it soothes your eyes.
After downloading the tool install it. Then tell f.lux what kind of lighting you have, and where you live. Then forget about it. F.lux will do the rest, automatically.
If you have any doubts or questions related to this, then do post them in the comment section below. I would be happy to help you.