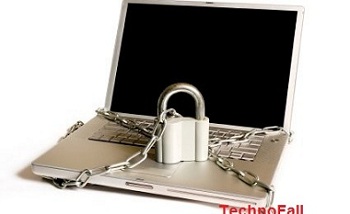
Do you leave your PC or laptop logged in for a short period and go somewhere else? Someone may just steal some important information from your machine. Want a security for your PC, when you leave it? You can lock computer using usb flash drive. This Flash drive will be like a key to UNLOCK your machine.
How to lock computer using USB flash drive:
For VIDEO TUTORIAL scroll to the bottom of the post.
After downloading the software, extract and then install it.
After you have successfully installed the software, run it from desktop. You will get a dialogue box like below.
Now when you see this dialogue box insert your flash drive and then click ok.
Now you will come across a window like the one given below.
First enter a password so that you can unlock PC, if your flashdrive gets lost (Counter Measure).
Check the drive letter for your flashdrive is correct or not.
Press the create key button.
Now Click on OK.
After clicking on OK, your software will exit displaying a dialogue box.
Now restart it from desktop. It will take some time to initialize. Then you will see a green ball flashing in your system tray.
Now whenever you pull out your flash drive, wait for the screen to black out. Whenever your screen blackouts, your system is protected. To unlock your system just plug in your flash drive.
NOTE: Installing predator will not affect any of your data present in your flash drive.
Also you can reduce the read interval time so that your system gets blackout faster.
Video Tutorial:
So this is a amazing way to use your USB flash drive as a key to your pc or laptop. If you have any doubts regarding this FEEL free to comment below.
Do you download a lot of things from internet?? After completion of download, does your Pc/laptop remains ON for hours?? Is guarding your pc/laptop till the completion of download or any work boring?? So here’s the solution. Even if you are not at your home, you can still shutdown pc form mobile using twitter. This will not only help in the case of download, but also in some time consuming tasks like copying or something else. This amazing method will help you shutdown pc from mobile using twitter, no matter where you are.
How to shutdown pc from mobile using twitter?
First you need a Twitter account and also a Gmail account. If you don’t have one, create it.
Now run the software form desktop or start menu or in right side of taskbar. It will look some what like in the image below.
Click on Sign in with twitter, and then it will open a page of twitter. In that, sign in with your credentials and you will get a confirmation code that you will need to enter in the tool. This will complete authorization process.
Now next is email settings. In this enter your gmail details.
Now just without changing anything click on SAVE AND HIDE.
Now the program is ready. Now you can just leave your pc/laptop on with the download or any other ongoing work.
To turn off the pc using mobile, just open twitter in mobile and just tweet SHUTDOWN.
After tweeting your pc will shutdown with a warning to close all app within 1 min. After 1 min the apps in pc will be forced to shutdown.
There are also many other commands available similar to shutdown. You can find HERE.
Also if you have any doubt regarding installation click here.
So A tweet will shutdown pc, no matter where you are. It is a unique way to shutdown pc. Imagine when you do it infront of your friend, he will be just shocked. Still got any questions, then do post them in the comment section below. I would be happy to help you.
Have your computer/laptop met with a virus attack recently? Have you got some of the services stopped due to it?? Want to recover them???Our Antivirus successfully deletes virus, but it fails to restore many of the services like cmd, task manager.. etc. So why not become independent, and do it manually. Yes of course you can do this easily. So today we are going to see how to Recover system after virus attack. We will need a utility named RE-Enable.
After downloading install the tool on your machine.
Now open up the utility, and you will find something like this.
Recover system after virus attack
Now Check all the applications you wanna recover, and then click Re-Enable. Now it will ask to restart your machine. So simply restart and you will find that you have recovered all the applications.
In this way you can recover all your applications again which will save you from formatting your Machine. Hope you liked this trick. Stay tuned with us for more such tricks and news.
Run commands can be used to boost your working speed. Typing just few words will do your work. Like if you wanna open calculator than you have to go to start->programs->accessories->calc. But if you go by run command then you have to open run->type calc and press enter. This way is more easier then the previous one. Well i am not saying that it is always convenient, but at some places it really do well. I have provided a complete list of run commands for windows below. Check out.
For those who have not ever used run commands, you can open up the run dialogue box by pressing WIN+R key, or you can go in start and search for run.
Calculator – calc
Certificate Manager – certmgr.msc
Character Map – charmap
Check Disk Utility – chkdsk
Clipboard Viewer – clipbrd
Command Prompt – cmd
Component Services – dcomcnfg
Computer Management – compmgmt.msc
Control Panel – control
D
Date and Time Properties – timedate.cpl
DDE Shares – ddeshare
Device Manager – devmgmt.msc
Direct X Control Panel (If Installed)* – directx.cpl
Direct X Troubleshooter – dxdiag
Disk Cleanup Utility – cleanmgr
Disk Defragment – dfrg.msc
Disk Management – diskmgmt.msc
Disk Partition Manager – diskpart
Display Properties – control desktop
Display Properties – desk.cpl
Display Properties (w/Appearance Tab Preselected) – control color
Dr. Watson System Troubleshooting Utility – drwtsn32
Driver Verifier Utility – verifier
E
Event Viewer – eventvwr.msc
F
Files and Settings Transfer Tool – migwiz
File Signature Verification Tool – sigverif
Findfast – findfast.cpl
Firefox (if installed) – firefox
Folders Properties – control folders
Fonts – control fonts
Fonts Folder – fonts
Free Cell Card Game – freecell
G
Game Controllers – joy.cpl
Group Policy Editor (XP Prof) – gpedit.msc
H
Hearts Card Game – mshearts
Help and Support – helpctr
HyperTerminal – hypertrm
I
Iexpress Wizard – iexpress
Indexing Service – ciadv.msc
Internet Connection Wizard – icwconn1
Internet Explorer – iexplore
Internet Properties – inetcpl.cpl
Internet Setup Wizard – inetwiz
IP Configuration (Display Connection Configuration)- ipconfig /all
IP Configuration (Display DNS Cache Contents) – ipconfig /displaydns
IP Configuration (Delete DNS Cache Contents) – ipconfig /flushdns
IP Configuration (Release All Connections) – ipconfig /release
IP Configuration (Renew All Connections) – ipconfig /renew
IP Configuration (Refreshes DHCP & Re-Registers DNS) – ipconfig /registerdns
IP Configuration (Display DHCP Class ID) – ipconfig /showclassid
IP Configuration (Modifies DHCP Class ID)- ipconfig /setclassid
J
Java Control Panel (If Installed) – jpicpl32.cpl
Java Control Panel (If Installed) – javaws
K
Keyboard Properties – control keyboard
L
Local Security Settings – secpol.msc
Local Users and Groups – lusrmgr.msc
Logs You Out Of Windows – logoff
M
Malicious Software Removal Tool – mrt
Microsoft Access (if installed) – access.cpl
Microsoft Chat – winchat
Microsoft Excel (if installed) – excel
Microsoft Frontpage (if installed) – frontpg
Microsoft Movie Maker – moviemk
Microsoft Paint – mspaint
Microsoft Powerpoint (if installed) – powerpnt
Microsoft Word (if installed) – winword
Microsoft Syncronization Tool – mobsync
Minesweeper Game – winmine
Mouse Properties – control mouse
Mouse Properties – main.cpl
Scanners and Cameras – sticpl.cpl
Scheduled Tasks – control schedtasks
Security Center – wscui.cpl
Services – services.msc
Shared Folders – fsmgmt.msc
Shuts Down Windows – shutdown
Sounds and Audio – mmsys.cpl
Spider Solitare Card Game – spider
SQL Client Configuration – cliconfg
System Configuration Editor – sysedit
System Configuration Utility – msconfig
System File Checker Utility (Scan Immediately) – sfc /scannow
System File Checker Utility (Scan Once At Next Boot)- sfc /scanonce
System File Checker Utility (Scan On Every Boot)- sfc /scanboot
System File Checker Utility (Return to Default Setting) – sfc /revert
System File Checker Utility (Purge File Cache) – sfc /purgecache
System File Checker Utility (Set Cache Size to size x) – sfc /cachesize=x
System Information – msinfo32
System Properties – sysdm.cpl
User Account Management – nusrmgr.cpl
Utility Manager – utilman
W
Windows Address Book – wab
Windows Address Book Import Utility – wabmig
Windows Backup Utility (if installed) – ntbackup
Windows Explorer – explorer
Windows Firewall – firewall.cpl
Windows Address Book – wab
Windows Address Book Import Utility – wabmig
Windows Backup Utility (if installed) – ntbackup
Windows Explorer – explorer
Windows Firewall – firewall.cpl
Windows Magnifier – magnify
Windows Management Infrastructure – wmimgmt.msc
Windows Media Player – wmplayer
Windows Messenger – msmsgs
Windows Picture Import Wizard (need camera connected) – wiaacmgr
Windows System Security Tool – syskey
Windows Update Launches – wupdmgr
Windows Version (to show which version of windows) – winver
Windows XP Tour Wizard – tourstart
Now if you have any questions regarding this, then do post them in the comment section below. I would be happy to answer your queries.
In today’s world, there are many methods to store data online. These all methods are based on cloud concept. Today i am gonna discuss one of the method in which you can use Gmail as an external Hard drive. The space which Gmail provides to store data, will be used to make a hard drive. And the amazing thing is you can carry it along you that too virtually. As it is virtual there is no chance of physical damage or getting corrupted. So lets start.
How to use Gmail as external hard drive??
First we will need a software for this called Gmail Drive extension shell. Download it from here
After downloading you can extract it using winrar/winzip.
So after extracting it, double click on setup.exe and accept the T&C.
So after successfully installing it, you can go to My Computer, and you will see a drive called GMail drive.
Double click on that drive. It will ask you for your Gmail ID and Password. So after entering details, it will confirm your credentials.
Now you will see a blank drive. You can just copy paste any data on this drive.
You will get a email for every file on your gmail a/c. So you can download data from any part of the world.
The interesting thing is that you get 10GB space online, that too for FREE.
So this was one of the way to store data on Gmail a/c. Hope you like this trick.
If you have any doubts regarding this method, then do post it in the comment section below.
We all watch videos on youtube mostly. You may have experienced buffering/loading of videos, which is sometimes a bit irritating. You can’t increase your internet speed. So even if you have a slow internet connection, you can buffer youtube videos faster. Below are the two methods given.
Buffer youtube videos faster:
Method 1:
Youtube Feather beta
This is a mode in youtube, where you can enter and buffer videos faster.
Now your youtube videos will buffer faster as compared to before. Note :Whenever you close your browser you have to again click on the link to re-enable Feather mode
Now this mode is specially created by youtube. It’s basically a lighter version of the normal, as suggested by its name Feather. Here it decreases video quality. So in the case the quality doesn’t affects you much, this method will be helpful to you.
Method 2:
Speedbit video accelerator
Speedbit video accelerator is a software, which can buffer your videos faster.
Whenever you play a video on youtube you will see the software buffering videos faster.
Its free for normal videos, but if you want to use it for HD videos, then it will cost you. A box appears in the bottom-right corner, when it buffer youtube videos faster. So you can see the software working and experience the change.
So these were the best two ways in which you can buffer youtube videos faster. Share your experience with us in the comment section below. Also if you have any doubts, then do post in the comment section below. I will be happy to help.
Do you download movies, software’s through torrent?? Have to wait for enough seeds??? Is your downloading slow?? Today I will teach you how to download torrent
through IDM, DAP. So get ready to download movies at 150-200kb/s and more. Follow the step by step tutorial.
When you search something in torrent and you come across download torrent button, You will see a Magnetic link. Copy that and paste in the box provided in zbigz site.
You can also simply upload torrent file by clicking “upload .torrent file“
Here in the image below i have posted the magnetic link.
Now click on Go button.
It will then ask you for free or premium. Click on free as i have done below.
Now you will see your required file (3.) Now click zip(4.).Again it will ask you for free or premium. Click free.
If you have configured your download manager (DAP, IDM)in your browser you can directly download with it. And if the download starts in your browser you can copy the link and paste in your download manager. See the image below.
Sometimes it shows error or take much time to show the download link. It also depends on its server load. So enjoy downloading torrent files via DAP,IDM or any other download manager. Hope you like my post. Share it on twitter, facebook etc
If you have any doubts regarding this method, do post it in the comment section below.
A Trojan is a spyware which may give a hacker, remote access to a targeted computer system. Once a Trojan has been installed on a targeted computer system, hackers will have remote access to the computer allowing them to perform all kinds of operations.Your PC may have a trojan through which someone can monitor your activities on your PC. So if your antivirus is not helping, then you can manually delete trojan. So today we will learn to find and remove trojan manually.
How to manually delete trojans??
For deleting trojan you need a tool called Process Explorer. You can download the tool from HERE. This tool is similar to Task Manager but it is modified and easy to use.
Download and extract the tool. Now open it. It will look something like this.
Now basically trojan runs in the background and sends information. So we will try to catch it in process explorer.
Now scroll down to explorer.exe. The processes showing above explorer are by default and necessary. Don’t make changes in that . We will only see the part below explorer.exe.
Now the main part i.e. searching for TROJAN.
Now it can have name like HOST, SVHost(remember there is a file named SVhost above explorer.exe. Dont delete it,it is NOT a trojan)
It will not have a company name.
Now if you find a file that you suspect as trojan by matching the above conditions. Right click on that file. You can click on kill process or you can also click kill process tree.
In this way you can delete trojan manually and you need not to depend on your antivirus.
If you have any doubts regarding this method, then do post it in the comment section below. I would be happy to help you.
Hi friends. Have you ever imagined that you can experience the joy of using Android Apps on your PC. Now no need to have mobile supporting Android apps, you can directly run Android apps on PC . First download Android apps for free and then install Bluestack App player to run those apps. If you are already having an android mobile, then also this app will be useful. When you turn on your PC, you can get all notifications there also. So it’s like having Android in both devices.
System Requirements:
Vista or windows 7,8, mac
2 GB Ram
Intel Core 2 Duo or more-powerful processor
Run android apps on pc:
Now if your machine meets the requirements given above, then you are ready to use the player.
Have you ever accidently deleted your important files or docs or anything. Ya i mean even from your recycle bin. I m pretty sure that it may happen with everyone. So today i will teach you how to recover deleted files.
How it works??
The concept behind this recovery is that, whenever you delete some files, the disk shows corresponding empty space, but the file is still present. Whenever you add more files, the previous files get overwritten. This deletes the files permanently. So recuva just scans for files which are not overwritten. In this way it recovers deleted files.
The concept is clear i think, so lets do it practically. So lets start.
How to recover deleted files???
First you will need a software named Recuva. It is a free tool. Download it from here
Now after downloading install it and launch it from desktop.
When you will launch it, you will see something like below. Simply click next.
Now choose the content which you want to recover. Eg. Image, music,document (You can select other if you want all files to be displayed). Then click next.
Choose the destination where files were initially present before deletion, means the last seen location. If you don’t remember, than you can choose ‘I m not sure’ and click next at last.
Now check the box which says ‘enable deep scan’. Deep scanning will take more time, but it is more reliable then normal one. Now click start.
It will start scanning your hard drive for deleted files. After the scanning completes, it will show you the files that can be recovered with green dot.
Now select the files you want to recover, and click recover. Also mention the location were you want to recover the files.
NOTE: Make sure you don’t select the same location where files were initially present. So better select new location and click ok.
This will start recovery process and you will find all your files within a few minutes. This was the method to easily recover deleted files.
DRAWBACKS
Now recuva is not the only tool to recover files. There are many tools available on the net which are more efficient then recuva.
Some good things about recuva is that, it is available free of cost and it is very simple to use. So if its a lower level matter, recuva would be a good option. Also remember that you recover the things as soon as possible, before they get replaced by other files. Stay tunned for other tips/trick about recovering data.
If you have any questions regarding this method, then do post them in the comment section below. I would be happy to help you.