USB Flash drive data recovery

How to Recover Lost Data from USB Flash Drive

Everybody in this digital age is busy in collecting, storing and sharing data. It happens a lot of times that you might accidentally delete something important from your storage device. Portable storage devices with less memory like USB Flash drive are often used for transferring small files. But using them frequently will result in accidents which involve data loss. But is the data really gone forever when deleted? Well, the answer is no if it is not overwritten by some other set of data. So today we will see how to recover lost data from USB Flash Drive.

Before we move ahead with data recovery part, let us see what happens when you delete data from USB flash drive. Even if you press “Shift+Del” which is the command for permanently deleting data in Windows operating system, it is not shown anywhere on the system. But the data still remains in the memory of the storage device. If you copy paste some other data on that USB drive, then the old data is replaced with the new one. Only then it would be difficult to recover it. So the first thing you need to do when the data gets deleted is, do not copy any other data in that storage device. There are many software available for flash drive data recovery out of which we will be using Wondershare Data Recovery. This software is a paid one but you can surely try it for free(up to 300MB data recovery).

Wondershare Data Recovery features:

It has some excellent features and modes that will help you recover data in different conditions. The software is available for two operating system now Windows and Mac. The system requirements for running Wondershare Data Recovery is very low, that means it can be used across any kind of hardware. Data loss due to deletion, formatting, inaccessibility, corrupt partition, unexpected power off, factory reset without backup etc. can be recovered using this software. Almost any kind of data let it be documents, image, video, audio, email, archive etc. are supported. Apart from that data from computer/laptop, memory card, digital camcorder, hard drive and Flash drives can be retrieved.

Recovery modes of Wondershare Data Recovery:
  • Wizard Mode: For all those who are trying out the data recovery process for the first time can choose this mode. Wizard mode will ask you some questions that will help you recover data faster. This mode works efficiently for a layman with less technical knowledge.
  • Lost File Recovery: Using this mode one can recover data with original file names and path which is a feature that you might not get in every data recovery software. This helps to restore things back to their original state.
  • Partition Recovery: This mode will help you to recover data from deleted, lost, damaged, formatted, and resized partitions. Doing experiments with partition can sometimes cost you loss of huge amount of data depending on the size of the partition.
  • Raw Recovery: This mode can help in situations of virus/trojan attack wherein the file system is all corrupted. So you can run a scan on raw hard drive which will provide you with preview of all the files that can be recovered with one-click.
  • Resume Recovery: Resume recovery can be extremely helpful when the size of the storage device getting scanned is huge and takes a lot of time. So you can perform scan and recover process in parts by saving the scan results and then resuming the search from where you left off.

So let us check the steps on how to recover data from USB flash drive. The steps will make the whole data recovery process very easy.

How to recover lost data from USB flash drive?

  1. Download the software from the aforementioned link with respect to the operating system you are running.
  2. Install it on the system and then run it. After you first launch the software, it will ask you to enter license code so you can skip that and try the software for free.
  3. The Wizard mode is the default mode that is launched, so you can switch to standard mode.How to recover lost data from USB Flash drive
  4. In that choose Lost File Recovery mode to recover data from USB flash drive.
  5. Make sure that you have connected the USB flash drive from which the data is to be recovered.How to recover lost data from USB Flash drive
  6. Choose the proper location and check the deep scan option.
  7.  After the scan is completed, it will show all the files that can be recovered.How to recover lost data from USB Flash drive
  8. You can choose the files and press recover.

Conclusion:

Make sure that you choose a different location for recovering the data and not the same one from where the data was deleted. The software works in the best possible way and shows promising outputs. The process is quite easy and fast even for a person from a non-technical background. So now you know how to recover lost data from USB flash drive. If you have any doubts then please post them in the comment section below.

formatted harddrive

How to recover data from formatted hard drive?

Keeping all your data offline is one of the best things to do when security is the concern. But offline data has location access restriction. Plus if the only copy of data gets corrupted or deleted then you are in some serious trouble. Many times it may happen that your most trusted personal machine might fail you. Because of some reason the data might get deleted or corrupted. Accidentally you may format the whole hard drive or a single partition. In such case, the data is not really gone. So today we will see how to recover data from formatted hard drive using EaseUS Data recovery wizard software. Before that let us understand a few basic.

What happens when you format hard drive?

Now this seems like a crazy thought that someone would actually format his/her hard drive accidentally. But trust me, for people doing some real experiments like dual booting, they might end up with formatted hard drive or a partition. I once deleted a partition accidentally and they didn’t even ask for confirmation before deleting every inch of data. So when you actually delete partition or format hard drive, the data is present but the address pointer is removed. So we cannot see the data. Unless and until you replace the old data with new one, hard drive recovery is very much possible. You can use various tools and software but in this tutorial we will use  EaseUS Data Recovery Wizard which is a free software and works great.

Quick tip: As soon as you lose some data, don’t paste any data in the same location. There is a chance that you might replace the old data making it unrecoverable. 

How to recover data from formatted hard drive?

  1.  Download data recovery software free from this link. EaseUS Data Recovery Wizard is available for free.
  2. Next install the software depending on the operating system you have – windows or mac.
  3. The steps to install it are pretty much simple and won’t take much time.
  4.  After successfully installing the software, launch EaseUS data recovery wizard.
  5. When you first open the software, you will find a screen asking you to choose a location to recover data from.
    How to recover data from formatted hard drive?
  6. If you have formatted the whole hard drive, then connect it to some other PC and install the software in that PC.
  7. You can recover data from formatted partition or USB drives or SD cards too.
  8. After choosing the location of data to search in, click ‘Scan’.
    How to recover data from formatted hard drive?
  9. Depending on the size of partition it will take some time. After scan is complete, results will be shown with files that can be recovered.
  10. If the results are according to what you were expecting then you can go ahead and recover the data.
    How to recover data from formatted hard drive?
  11. Remember one thing that the destination of recovery files should be different from where it was lost. If you recover the data in the same location then you might overwrite the remaining lost data and create a big mess.
  12. Many times you may not get expected results with quick scan. So this time you can use the ‘Deep Scan’ option to search in depth. This will surely take much more time than quick scan.
  13. Deep scan will actually perform good and recover almost all your data. The time is worth the wait.
  14. After that remember to press recover and choose different location to recover files.

So in this way you can recover data from formatted hard drive. If the process of scanning took much time then you can save the results and recover everything any other time. But it is not wise to wait too much to recover the lost data.

Features of EaseUS Data Recovery Wizard:

  • Easy Installation
  • Recover data from multiple sources hard drive, USB drives, memory card, digital devices etc
  • Recovering is possible even if the files were formatted, accidentally deleted, hard drive failed, system crashed, virus attack, partition loss etc
  • Support for Windows and Mac
  • Import export scan results to recover data later
  • Bootable media with Pro+ WinPE version

EaseUS Data recovery wizard has a very clean interface and the software knows what it is mean to do. It has one main goal of recovering which it does very well. Though the deep scan took some time but worked great. You can always go for paid version if you want to recover unlimited data. So this is how to recover data from formatted hard drive. If you have any doubts then post them in the comment section below.

matrix-1013612_960_720

EaseUS Data Recovery Wizard Free Review

With the increase in the dependency of data, people are considering it as one of the most important assets now. Digital data is easier to store, transfer and analyze. Plus taking backups is now a faster process, which not most of the people practice. Due to this, the loss of data can be a serious problem to those relying on the digital age. If you have some important chunks of data stored in your office computer and accidentally someone deletes all that, so is your data permanently gone? Well the answer is no. The first thing people will check is the recycle bin, but what if it is empty. Still I can say that your data is on the hard drive. Then the next question is how to retrieve your deleted data? There are many Free recovery software in the market out of which we are reviewing the one called EaseUS Data Recovery Wizard. In this review, we will actually check how good is this software and what are the various features.

What happens when my data gets deleted?

Before moving on to the review, let us try to understand what happens to your data when you delete it permanently. After deleting the data even from recycle bin, it stops showing anywhere on the Windows explorer. But your data is still present on your hard drive and it has only stopped showing in explorer. If you delete certain amount of data from partition A and add another set of data to the same partition, then some of the data deleted previously gets replaced/overlapped by the new data. Data recovery works best when the old data is not replaced by any new data. So as soon as you have lost your data, avoid copying any new data to the same location. Hard drive recovery using a software is totally possible if it is not physically damaged.

EaseUS Data Recovery Wizard Free Review :

The software is available for two platforms viz. Windows and Mac. Depending on the operating system you can download the Free version. The installation is a simple Next and Finish process. Size of the software is less than 16MB for Windows and the latest version is 10.8 . The installation takes up to 41MB of disk space. It is free of adware till now so you don’t need to worry of additional software getting installed while you run the setup. Plus there are no search engine or homepage changes which shows that it has a clean setup.

After installing you get 500MB of free data recovery limit which can be increased by 1.5GB by sharing their software on social media that includes Facebook, Google Plus, and Twitter. You just need to share it once on any one of the given websites. So if you want to use the Free version you can recover maximum 2GB of data.

screenshot_4

Steps to recover data with EaseUS Data Recovery Wizard Free:

  1. Download install the software. Launch the software from desktop or start menu.
  2.  After launching make sure you have shared their software once and your data recovery limit is 2048MB i.e. 2GB.
  3. Next you will see the option to select the type of data you want to scan for. Choose the proper type, and if you can’t decide select all. Note: Scanning will not consume the limit provided with the free version.

    screenshot_5

  4. After you select Next, you will get an option to choose the location from where the data was lost. If it is on a removable disk, plug it in and then select the proper option.
  5. The next step is to press the scan button so that the software will start the magic. If you get the data you were looking for, then you can select and choose to recover. If not then you have an option of deep scan which will take more time but is more effective in finding the data than normal scan.
  6. The last step will recover the data. Always remember to choose the recovery location something different from where it was lost.

You can watch the video to understand the process in much more detail. The Free version also does a pretty good job of recovering lost data and the software is well built. A thumbs up from my side and you can definitely go for this software.

REOS Lite LED smart bulb

REOS lite LED smart bulb full review

Internet of things is the new topic which is trending a lot nowadays. It basically means connecting everything to the grid i.e Internet so that we can monitor or control things without any restriction. So a company named Cube26 has launched their new smart bulb under the branding REOS which was previously called IOTA. REOS lite LED smart bulb can be controlled directly from your smartphone and has millions of color options to choose from. So let us do REOS lite LED smart bulb full review to find out if it is really that smart.

REOS lite LED smart bulb full review

REOS lite LED smart bulb

REOS lite LED smart bulb full review

Design

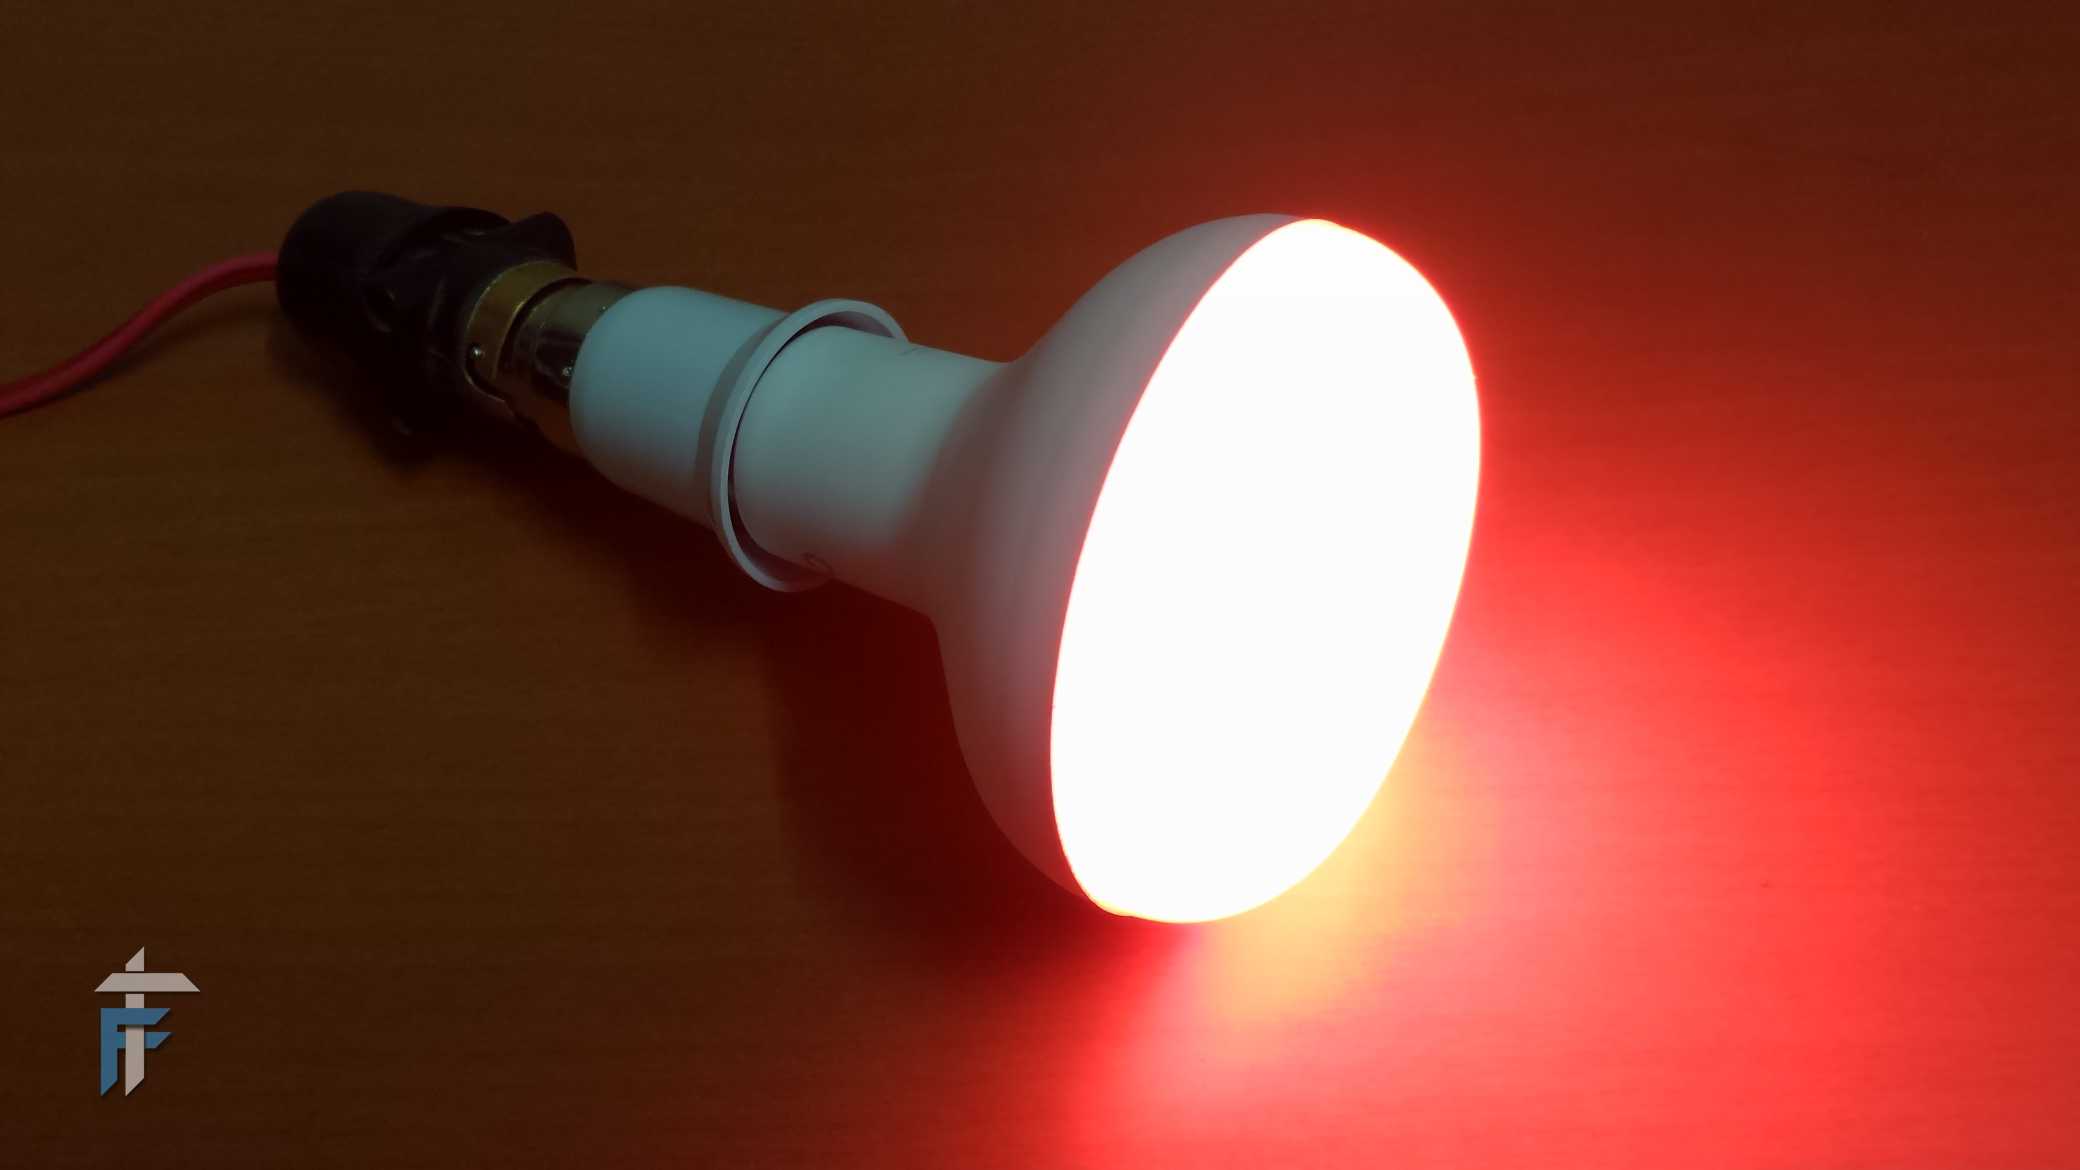
The new design of the REOS smart bulb is quite different from the previous IOTA bulb. It is now much wider at the top and slim as we move towards the bottom. With all the added smart features, it is heavier than your traditional bulb at home. You may need a connector if you live in India, which comes free with the bulb. The build quality is good and it is available in only white color.

How to connect to REOS lite LED smart bulb?

REOS smart bulb uses bluetooth(4.0+) for the connection. Currently, the app for REOS smart bulb is available on Android and iOS platforms only. Download links are given below.

  1. Connect and switch ON the bulb from your switchboard. Turn ON the bluetooth and GPS. You will need to enable GPS for the bluetooth pairing as it is now mandatory after the Android 6.0 update.This is the reply that I got from Cube26 regarding the GPS issue: From Android 6.0 (Marshmallow), Android SDK makes it mandatory for all BLE connections to have location access. It has nothing to do with Reos Lite App. Anyone using any BLE device with Android 6.0 or higher will have to give location permission. He will have to do the same thing with fitbit or any other wearable.
  2. Launch the app Reos lite and then search for the bulb. After you find it, you can rename it. Also, set it to auto-connect so that every time controlling the bulb is much easier.
  3.  Now you can try changing the color, intensity and the modes of the bulb.

If you face any problem, then restart the bulb from the switchboard and do the same thing with the app too.

Features of the REOS lite LED smart bulb:

You must be wondering only the connectivity with smartphone is the smart feature we were referring to, but no. There are other features that make this bulb smart.

This slideshow requires JavaScript.

Color options

You can almost choose any shade of any color from the two default palettes. Out of the two, one palette has multi-colors and the other just has two shades of white that are orange(warm) and blue(cool). Apart from that you can also pick up color from your background by taking a picture and making your own palette. Apart from this you can also set your favorite color using Voice commands. There is an option to change the intensity/brightness(Max – 1100 Lumes) using the slider.

You are reading: REOS lite LED smart bulb full review

Music Synchronization

This is a very nice feature with ready made music syncing option available that works just great. You will need the Reos Music app for the synchronization to work smoothly. Using this mode you can make the bulb dance with multi-colors on the beats. The intensity of light increases and decreases according to the music volume. Default music can be replaced by using the audio input from microphone.

Modes

There are various default modes like Kaleidoscope, Strobe, Candle, Christmas, Reading, Party and Movie. All the modes have different color options and light intensity depending on the ambience you want. If you are not satisfied with the default mode, you can also create your own custom mode.

Alerts

Now this is a very cool feature which was totally unexpected when I got the bulb for review. Reos lite LED smart bulb is also capable to notify you of any incoming calls,SMS or notifications from Whatsapp, Facebook(you can define it for specific person or action). It also tells you if your pizza or your cab has arrived. The apps supported in the current version of Reos are Youtube, Weather, Whatsapp, Hike, Ola, Uber, Facebook, Tinder, Domino’s, bigbasket, Grofers, and Swiggy. We are expecting more apps in the future. The notification methods include Fade In, Fade out, Candle Flicker, Strobe, & Kaleidoscope.

Scheduler

Reos lite smart bulb can also be scheduled to turn ON or OFF between certain time period. You can also set a timer for the same action. For example, if you wish to turn On the bulb every day at 7PM-11PM in the evening  after the sunset.

Virtual Mode

Want to try out the app features before you buy the bulb? You can do this using the virtual mode. Just download their app and visit this website. Scan the code and then try out the various features of the bulb on a web page.

Pricing and availability

The REOS lite LED smart bulb is available for Rs.1699 on Flipkart. You get 1 year warranty for this smart bulb.

So this was the REOS lite LED smart bulb full review. There are still a few bugs in the app which are constantly being fixed by the company with the new updates. Many features will be pushed in the coming future. This is something that I would recommend getting as your first Internet of things product. There are other companies like Syska making smart bulbs but currenty REOS is the clear winner. Let us know what you think about these new smart products in the comment section below, doubts/feedbacks are welcome too.

iris scanner software aadhar

Delta ID announces ActiveIRISIris for Aadhaar Authentication

Delta ID Inc., a leader in consumer-grade iris technology for mobile devices, announced today its ActiveIRIS software is amongst the first to pass the Performance Testing of integrated mobile devices used for Aadhaar authentication. The Performance Testing was held by STQC, in collaboration with C-DAC and Unique Identification Authority of India (UIDAI), under the Ministry of Electronics & IT of the Government of India, during May 2016 in New Delhi. Delta ID’s ActiveIRIS software integrated in the Samsung Galaxy Tab Iris was also the first to be awarded provisional certification by STQC prior to the Performance Testing.

Delta ID Logo

“We want to congratulate Delta ID on passing the Performance Test for its iris software for integrated mobile devices for Aadhaar. The Performance Testing required a pass rate of better than 99% when tested with 5000 residents,” said Mr. Umesh Kumar Nandwani, Director General of STQC, “With the availability of iris integrated mobile devices we hope to make the use of Aadhaar even more convenient and reliable for our residents.”

With Aadhaar enrollments crossing the 1 billion mark, the use of Aadhaar for resident authentication and eKYC is expected to rapidly spread across services for government and private enterprises. The need for a biometric modality that works reliably is critical for the use of Aadhaar, a key component of the government’s Janadhan Aadhaar Mobile (JAM) led initiatives. The iris is widely accepted as a more secure and reliable modality to identify and authenticate people. The iris works across a broader population, across all age groups and occupations.

“I believe we are at that the cusp of a major change in how biometrics, particularly, iris will play a role in enabling access to a variety of services we use in our daily lives,” said Dr. Salil Prabhakar, President and CEO of Delta ID Inc., “We thank STQC and UIDAI in planning and conducting the rigorous Performance Testing in the most competent way. This effort will serve both the government and residents of India by ensuring only the most reliable iris integrated mobile devices are used for Aadhaar authentication and eKYC applications.”

Delta ID has made remarkable advances in bringing iris technology to consumer mobile devices and applications. Delta ID’s ActiveIRIS® technology includes software for iris capture and segmentation for authentication with UIDAI servers. When combined with UIDAI standard compliant iris hardware components, ActiveIRIS software enables iris based Aadhaar authentication and eKYC that works reliably across the population in conditions and scenarios where users typically use their mobile devices.

Something about Delta ID


Delta ID was founded in 2011 with the mission to bring secure and convenient biometric authentication to mass market computing devices. Delta ID’s ActiveIRIS® technology includes patented software and hardware design to enable iris recognition using simple hardware that can be easily integrated in mobile and PC devices. Delta ID is based in Newark, California and backed by Intel Capital and other strategic investors.

Casio India introduces new models to its EcoLite series of LampFree projectors

Further advancing the projector technology, Casio India Co. Pvt. Ltd. (CIC) introduced three new models to its EcoLite™ series of LampFree® projectors. The new additions, XJ-V2, XJ-V100W and XJ-V110W combine a high brightness, amplified colour spectrum, and eco-friendly design. The models come with Casio’s 5th generation Laser & LED Hybrid Light Source technology that reduces the power consumption up to 50% and feature a dust resistance design to ease the maintenance of projectors.

Casio EcoLiteT series of LampFree® projectors

Casio’s EcoLite™ series is known for its reliability and offers a multipurpose, cost-effective performance for business and schools. The Laser & LED Hybrid Light Source technology combines a laser, fluorescent element and LEDs to generate high brightness with minimal brightness degradation and continuous operation. It also provides a 30% increase in LED light output, thus offering a greater increase in colour spectrum when compared to a mercury lamp.

Casio EcoLiteT series of LampFree® projectors (i)

Mr. Kulbhushan Seth, Vice President, Casio India said, “Casio has pioneered the eco-friendly LampFree® technology in Indian market with its EcoLite™ series of projectors. The new models are ideal for a variety of applications especially for heavy users like schools, institutions and offices who wants to upgrade to this greener technology. The projectors come with long life, high durability, low energy consumption helping to reduce Total Cost of Ownership (TCO) while ensuring no lamp replacement while having a life of approx. 20,000 hrs.”

“The LampFree™ technology also ensures less maintenance and eliminates the need to replace expensive and hazardous mercury lamps, which makes them cost-effective and safer for the environment,” he added.


The XJ-V2 features 1.1x optical zoom, produces 3000 lumens of brightness, XGA (1024 x 768) resolution, XJ-V100W comes with 1.5x optical zoom, produces 3000 lumens of brightness, WXGA (1200 x 800) resolution while the XJ-V110W features 1.5x optical zoom, produces 3500 lumens of brightness, and boasts WXGA (1200 x800) resolution suitable for displaying content from video and computer sources. Other benefits include unrestricted 360° installation that supports highly flexible image projection, including portrait projection from a vertical position, or perpendicular projection onto the floor or ceiling.

It comes with a standard 3-year warranty on Main Projector Unit along with a 5-year or 10,000-hour warranty on the Laser & LED Hybrid light source. With a vision of ‘Go Lamp Free’, Casio brings the EcoLite™ projectors at a disruptive price point to make Laser & LED Hybrid projectors a mainstream in the market.

MODELS            CONSUMER PRICE
XJ-V2                 –   INR 56,995
XJ-V100W      –   INR 74,995
XJ-V110W      –   INR 79,995


407f7c18-db80-43db-a87d-2d7a3d0e0c0f

Top 10 features of MIUI 8

MIUI 8  was launched today with the Mi MAX smartphone in India. It has got some amazing customization options that will give you a lot of choices. Along with that it focuses on making the daily tasks easier like taking screenshots and stuff. So let us see the top 10 features of MIUI 8. Also I will tell you when MIUI 8 is releasing and for which smartphones will it be available.

407f7c18-db80-43db-a87d-2d7a3d0e0c0f


Top 10 Features of MIUI 8

  1. Colors

Top 10 Features of MIUI 8 ccad6164-4c8c-47f3-803e-27777f5bfcf7


The have added more colors in the apps background especially the Weather app. The color of the weather app in notification changes according to the time of day and the weather outside. So you can instantly get a feel of the weather outside from the app itself. There are some animations added for rain, snow, wind etc. In the notification panel you have the weather widget on the top, followed by switch toggle for Wifi, bluetooth, data etc and at the last notifications.

2. Gallery


They have replaced the square thumbnail only gallery with the panorama gallery. You can view the panorama shots in a much more wider thumbnail. Next comes is the sharing of photos with the gallery app. Now it is much simpler to share pics by just swiping up. To free up some space that is taken by photos, MIUI 8 comes with Mi Cloud Photo Sync feature. It can sync up to 90% of the space taken by photos. You can save the high resolution previews locally to load the photos faster. After photos comes video editing which is a much needed feature on any smartphone. Now you can trim videos, add dramatic filters, add background stuff and much more directly from your phone’s gallery app.

3. Screenshot


Most used feature by everyone on a daily basis is taking screenshots. But taking a full page screenshot is not just possible so we take multiple screenshots instead. But now with MIUI 8 you can take scrolling screenshots. How to do that? Just take a normal screenshot, tap on the screenshot which will appear on the top right corner of the screen. Next just scroll down the page till you want the screenshots to appear and tap done. So you can take custom screenshots by adjusting the height.

4. Quick ball

Top 10 Features of MIUI 8

This is a quick access feature you must have seen in the TSF launcher. Quick ball comes with MIUI 8 where in you can set 5 apps/options to access quickly. You can take screenshots, toggle data, even keep the back button, or may be quick access Whatsapp, Facebook or other apps. Quick ball can be directly used from the lock screen too.

5. Calculator

Top 10 Features of MIUI 8

With MIUI 8 new calculator you can directly do conversions like weight, currency, and temperature. No matter which country you visit, you can just launch the calculator app to do the conversions right away.

The best is yet to come in the list of top 10 features of MIUI 8.

6. Dual Apps


This is one of the best features that I feel of MIUI 8. With Dual apps you can use two accounts simultaneously for Whatsapp, Tinder, Facebook, Twitter, Clash of clans and many more. So yes you can run two Whatsapp accounts for work and personal use without any fear of someone seeing your last seen. This is the best feature for bloggers with multiple accounts.

7. Separate Workspaces

29d71e62-57c8-4bc6-947f-31060c42c00c

Yes it is what you think, two totally different workspaces with different apps on home screen with MIUI 8. So it is like having two smartphones in one. This feature is like multiple desktops in Windows and Linux. You can totally open different apps do different work in each workspace. Also you can keep different pattern lock to access different workspace.

8. Ringtones

b947c78b-74e5-4b7a-b328-768683fabde8

You get access to unlimited ringtones with Hungama and you can download them for Free if you are running MIUI 8. Ringtones will be available in themes store for Indian users and they are all free as of now.

9. Themes

7f19ddce-442b-40d6-9ee8-7085b39afd51

369 new themes are now accepted from the competition for making custom themes. So you have a whole lot of new themes to try on.

10. Dialer App

ccaa8c71-ed50-48d6-8853-a3daeb765a3a

eb2d6cd4-e9f2-437f-ab69-488613292ee5

4c651e7d-bd6b-4b29-9356-55f56afcfb3c

Now it is possible to search directly using the T9 hindi inputs for contacts. MIUI 8 also comes with its own caller ID identification built in feature. So no need to install additional apps like truecaller. They have also partnered with many companies like Amazon, Domino’s, Swiggy, Zomato to detect the delivery guys number automatically. So you always know who is calling you on your phone.

The public beta OTA will start on 11th of July 2016 and the stable release will start rolling on from 16th of August 2016. Below is the list of devices which will be getting the MIUI 8 update.

a9c557d0-1685-4748-b8b4-1cea3d63b87f

So these were the top 10 features of MIUI 8. How did you like the new features of MIUI 8 and are you excited to use it? If you would like to add a feature in MIUI, which would that be? Let us know in the comment section below.

Source Images

Make USB bootable Linux or Windows

Guide: How to make USB bootable

I have received a lot of doubts related to installing any operating system. Though if you go ahead and Google the query you will surely find the answers. But then I thought to make my own version of Guide on how to make USB bootable explaining each and everything. I will also recommend some of the software that I use to make USB bootable. So let us begin with the very basic question that is, what is USB bootable?

Guide: How to make USB bootable

What is USB bootable?

Before the trend of USB drives/Pen drives, we all used to install an operating system using a CD/DVD. But now everybody has USB drives which we can use to install the operating system. Now as you know that once you boot your system, after the company branding the operating system kicks in. So if we need to replace that operating system we need to do it before the operating system starts. So all the files of installation comes in a common format called “.ISO”. ISO is basically an image of the optical disc, meaning it has the files copied from the optical disk sector by sector. So if you wanted to generate an exact virtual image of an optical disc, you would do that in the ISO format. All the files are packaged in one single file that ends with a .iso extension. Answering the main question, USB bootable means we will basically copy all the files from the ISO file to USB drive in such a way that it boots on the startup. So one thing is clear that all operating system will come in ISO format.

Where can you find the ISO file?

Well for most of the free Linux distribution it will be available on their respective websites. For Windows you can may be search for it on Google for the official ISO file. For Windows 7/8 I have mentioned a tool below that can also download the ISO file for you. And apart from that you always have one other source where you find all the things which I can’t say it directly but it starts with ‘T’.

Requirements

  • ISO file of operating system
  • A USB drive of 8GB at least (USB 3.0 would be preferable)
  • A software to make USB bootable

We will be using a software to make USB bootable. It all depends on which operating system you are thinking to install. Nowadays most of the tools support all operating system and are universal. The list of top tools with their download links is given below. Use any one of them.

Software USB bootable:

If you are familiar with Linux then you can also use DD commands which works great too. Before starting with the procedure let me tell you that if you are thinking to dual boot then you can go for the alternative of running the operating system using virtual machine software. Also if you want to do it for DVD then just burn the .iso image directly on it or use the same tools.

GUIDE: How to make USB bootable?

I am going to use Rufus for showing you the procedure.

  1. To begin with make sure that your USB drive is blank and has no files, as this procedure will delete everything.
  2. Next launch any software from the aforementioned link, very few will actually require installtion.
  3. After that it will ask you to choose various things out of which two options are really important. One is USB drive letter and second is .ISO file location. Apart from that the name of operating system may or may not be asked.
    Note: While selecting just choose the option that says I have the ISO file or else it will re-download the whole thing.

    Guide: How to make USB bootable

    Rufus USB bootable Options

  4. After selecting those options you can choose if you want to format the drive or not. Well format is recommended from my side.
  5. So the preparations are done and now you can go ahead click start which will give you some warnings just click yes.
  6. After certain time interval the progress bar will hit 100% and the process will be completed. Now it is safe to remove the USB drive.

This is how to make USB bootable using software and ISO file. There is again one step left before you start the installation which is, go to BIOS setting of your machine and check the boot priority. Always set the boot priority of USB drive to the top so that it boots before the hard disk or DVD-ROM. If you have done the procedure carefully you will see installtion starting. If there is any issue then may be your ISO file is corrupted. If you have any doubts please do mention them in the comment section below.

LCD Monitor Repair and disassemble : Samsung Syncmaster 943NWX

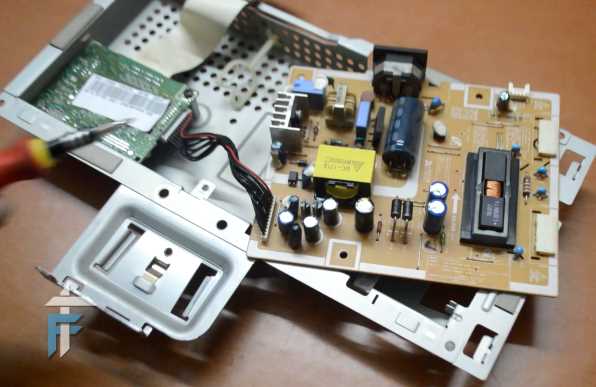
The Problem Statement: Suddenly one day my Samsung LCD Monitor stopped showing anything when I powered on my PC. There was no check signal cable dialog box when I removed the VGA cable, only the blue power LED blinking. So I planned to disassemble the monitor and check for issues. There were 3 capacitors which were swollen up so I suspected that they were fused. I replaced them with new ones and boom my LCD monitor repair is done. I can see the check signal dialogue box rolling all over the screen. You can buy the capacitors in any nearest electronic component shop, just check the value of capacitor and the polarity.

What may have happened: Due to power fluctuation the capacitors got fused which basically does the job of holding charge. Many times this can be only a temporary solution, main cause being different. But in my case this worked fine and it is still working great. So check out the video on how to disassemble and repair any monitor in the step-by-step tutorial below.

LCD Monitor Repair and disassemble : Samsung Syncmaster 943NWX

How to make Free Calls anywhere in the world

How to make free calls anywhere in the world

Free calling – the first thing that comes to our mind is Skype, Whatsapp or other apps and software. But all these services require both parties to install their apps to make free calls. It is not necessary that the other person (callee) would be interested in installing new apps. In that case, I will show you how to make free calls anywhere in the world without imposing any restriction on the callee.

How to make free calls anywhere in the world?

Let’s start with some websites and then move on to apps that provide free calling. Note that all the services offered will have a time restriction for each day. But this can be very useful in the state of emergency, or when you need to make a quick call or you can tell the person to call you back.

  • Websites that offer Free Calls
  • Android Apps with Free Calling (Recipient dont require internet)

Websites to make free calls anywhere in the world:

Call2Friends

This is one of the best services that you can get online to make free calls. You get one Free call per day with some time limit that will totally depend on your country and service provider. So suppose I am an Indian User trying to call another Indian user then I get 90 seconds time limit. The callee will receive a call from a random number and not your mobile number. Now they have made signing up process mandatory for all users. So you need to create an account before you start making free calls.

How to make free calls anywhere in the world

Call2Friends make free calls

Type in the mobile number in International format or choose a country first and then enter the mobile number. Next, you need to press the call button to connect the call. Your browser may ask permission to use the microphone and you need to select Allow. In this way, you can make one free call per day unless you know some technique to change your IP. Remember if you called on some number using your home PC, and on the same day if you try to call the same number from office PC, then it won’t work. Any number in the world can be called only once per day using this service which is quite annoying.

iEvaPhone

How to make free calls anywhere in the world

iEvaphone free calls screenshot

This service is exactly similar to call2friends. One difference is that here you don’t need to Sign Up. Just follow the above same steps and enjoy your 1 free call per day. I know it’s not much but it can be used in an emergency or for small talks when you don’t have balance.

Zadarma

How to make free calls anywhere in the world

Zadarma Allow access to microphone

When you sign up and create a new account you get 0.5$ Free bonus. You can use this bonus to make calls to different countries. Along with that, the free plan has 100 free minutes to offer for the first two months. Sometimes these free credits are not visible and don’t work so try some other time. In the homepage, there is an information section where you will find ‘call from website’ option. After that, you can choose Flash or WebRTC(Show WebPhone) to display the dialer. Next, dial the number with country code and enjoy your free minutes. The call is placed from some random number from UK.

LocalPhone

How to make free calls anywhere in the world

Localphone free call signup

Visit their website and sign up for a new account. Once you complete the signup process, you will be told to download their windows client through which you make free calls. One free call will last for 50 seconds and I was able to make 2-3 free calls. I am not sure if they renew the free credits but you can earn more credits by referring this service to your friends. You have the option to change the caller ID to Hidden, random number, or your mobile number too.

RingToIndia

This service offers 30 free minutes only once when you sign up. If you want more then you need to create another account with different credentials. Note Indian users cannot sign up on this website and I don’t know the reason. But if you have a number from outside of India then you can surely go ahead and give this awesome service a try.

Android Apps to make Free Calls

Nanu

This is one of the best apps that offers up to 42 minutes of free calling with 85 credits when you first sign up. You can earn more credits by completing the task mentioned like installing apps and games. There is no referral program to earn credits. If the other person has Nanu installed then you can enjoy unlimited VoIP calls and messages.

TalkU

How to make free calls anywhere in the world

TalkU free calls credit

When you first sign up using this link for a new account you get 15 free credits. They have different call rates for different countries so the Free credits will be used accordingly. This is one of the most rewarding programs at it will offer you some daily free credits for checking in. Also, you can complete the offers or watch the ads to earn more credits. There is also a referral program where you can earn 20 credits for each friend you refer. You also get bonus credits if you purchase credits from the store.

Dingtone

Dingtone has a system exactly like TalkU and the reward program is also same. Just Sign Up using this link to get 20 extra credits in your account.

Tap4Call

How to make free calls anywhere in the world

Call from a private number

This app offers 0.10$ free when you sign up using the above link. The speciality of this app is that you can call using a private number so your number will not be displayed. Instead, the caller will see “Private Number” or “Number Withheld” on his caller ID when you place a call. This is so cool just like the James Bond movies. Along with that, you can earn more free credits by completing actions such as downloading other apps.

Libon

You get 5 minutes of free calling anywhere in the world. Note that there is a time validity on these credits, so you need to use it before the expiry date. You can go to settings and hide your number if you want to turn on the “James bond” mode. You don’t have any option to increase the Free minutes so it’s like a one-time offer.

So this how to make free calls anywhere in the world with hese websites and Android apps. You can search for more such websites and Apps in your respective stores and also share with us in the comment section below. If you face any difficulty or you have something to share with us all then do place it in the comment section below.