Brief Introduction to iTunes Songs
iTunes Store is serving millions of users by a large collection of songs in various formats including AAC, MPEG-4, M4A, etc. All are protected by the DRM (Digital Rights Management) to restrict unauthorized use or duplication of the music files. Various restrictions like streaming to five computers every 24 hours, unlimited CDs (seven with an unchanged playlist), unlimited iPods and iPhones are implemented to each music file you download from the iTunes store. Even it’s a good feature to protect the music files, it is irritating to have such a restriction on a file that we have paid for.
Best Solution to Convert Purchased iTunes Songs to MP3
Converting the iTunes songs to MP3 format using a DRM converter can solve the problem and make the music file accessible in any devices without any restrictions. So, we need a good DRM removal tool that can do the job effectively.
AppleMacSoft DRM Converter for Mac is such a good software that helps to remove the DRM protection by converting the iTunes songs to MP3 format. The software power packs some good features that can convert the purchased iTunes songs to MP3 format effortlessly. Fast processing speed, various output formats, user-friendly interface, complete iTunes integration, all made it the best solution to convert iTunes songs to MP3 format.
How to Convert Purchased iTunes Songs to MP3 using AppleMacSoft DRM Converter?
To convert the iTunes songs to non-protected .mp3 format, download and install the AppleMacSoft DRM Converter on your Mac. Then, follow the simple steps given below.
1. Import the Purchased iTunes Songs

By default, iTunes will automatically add the downloaded iTunes songs to the library. If not, you have to import the purchased iTunes songs to your iTunes library. Then, open the AppleMacSoft DRM Converter. The software will now fetch the iTunes and import the songs automatically. If the music files are not listed there, just click the Refresh icon on the upper left corner of the window. Then, the software will fetch the music files.
2. Select Songs that you want to Convert to MP3 format
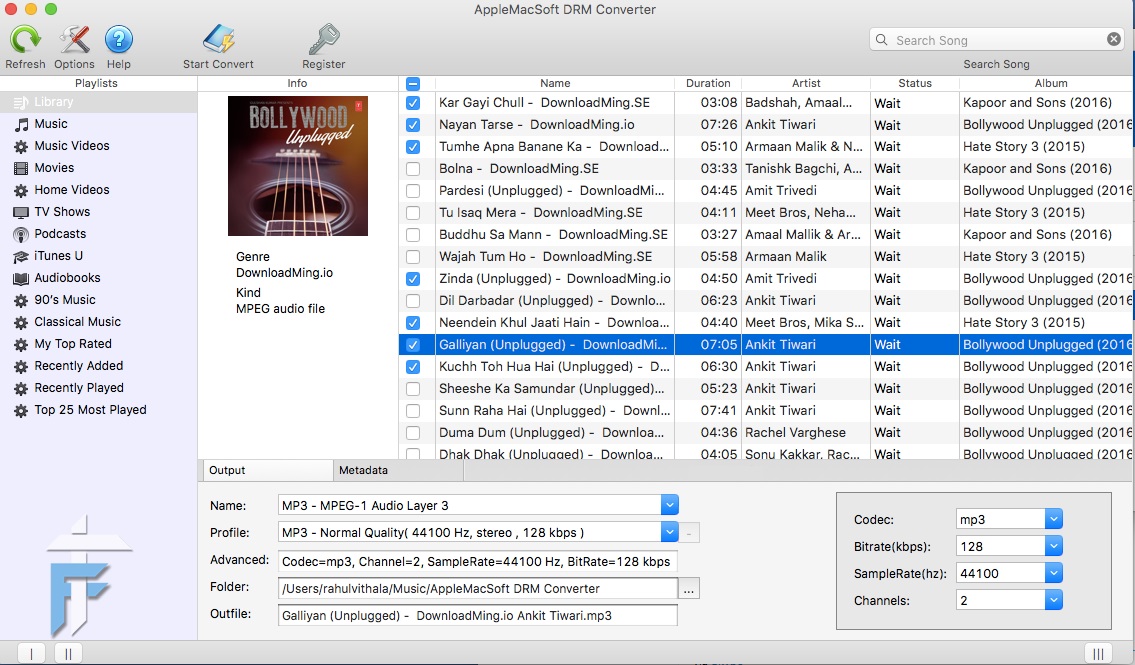
Now, select the songs from the list that you want to convert into the non-protected MP3 format. All details regarding the songs will be listed next to each song that makes it easier to find out the correct ones to convert.
3. Choose Output Format as MP3 and Set Configurations
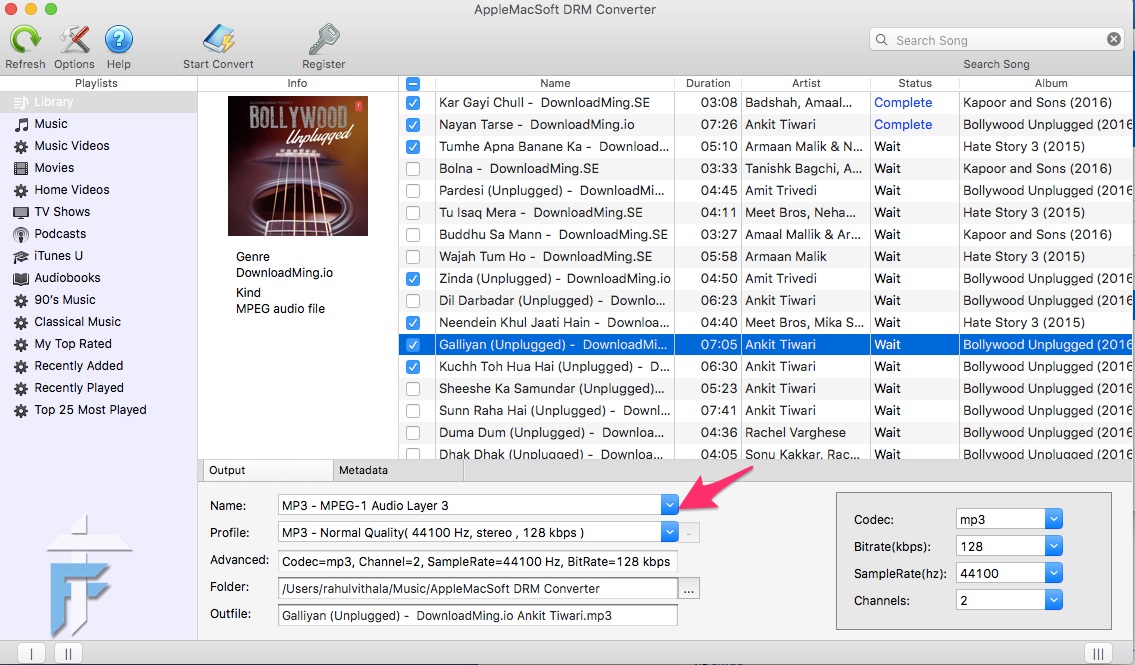
Now, select the Output format of the songs as MP3. All other settings will be automatically configured by the software. If you wish, you can also tweak them.
Then, select the output folder by clicking on the Browse button in Folder section. You could also tweak the configurations like Codec, Bitrate, SampleRate, Channels, etc.
Note: We do not recommend tweaking these settings unless you are aware of what you are going to do.
4. Start Converting iTunes Songs to MP3 format
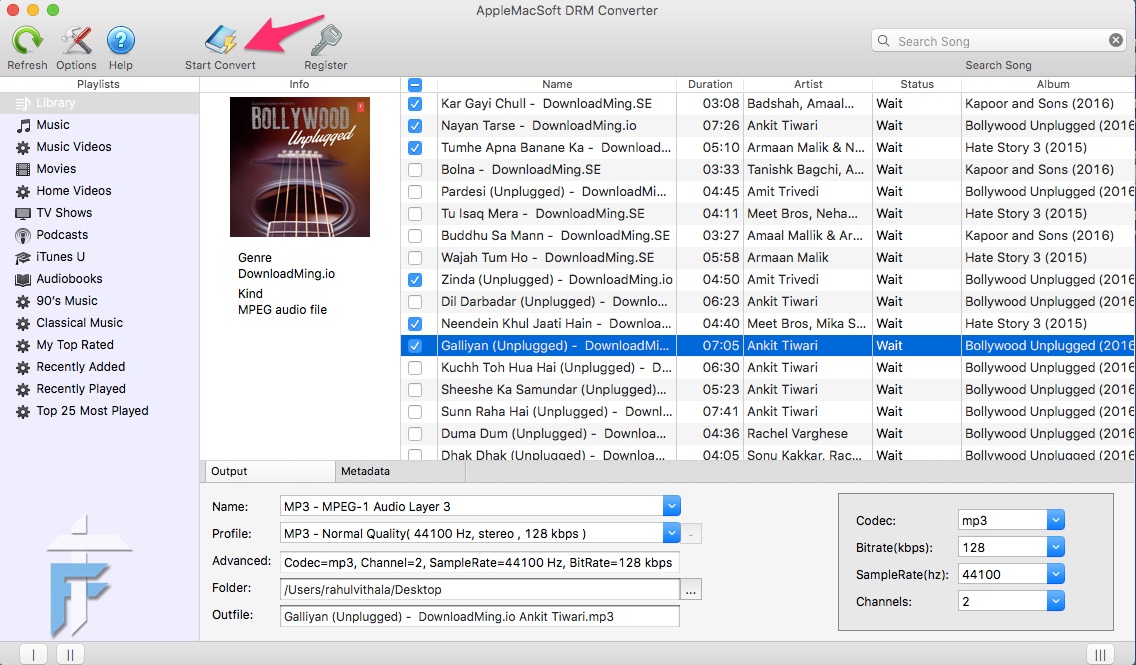
After configuring the settings, start converting the iTunes songs to non-protected MP3 format by clicking on the Start Convert button on the upper bar.
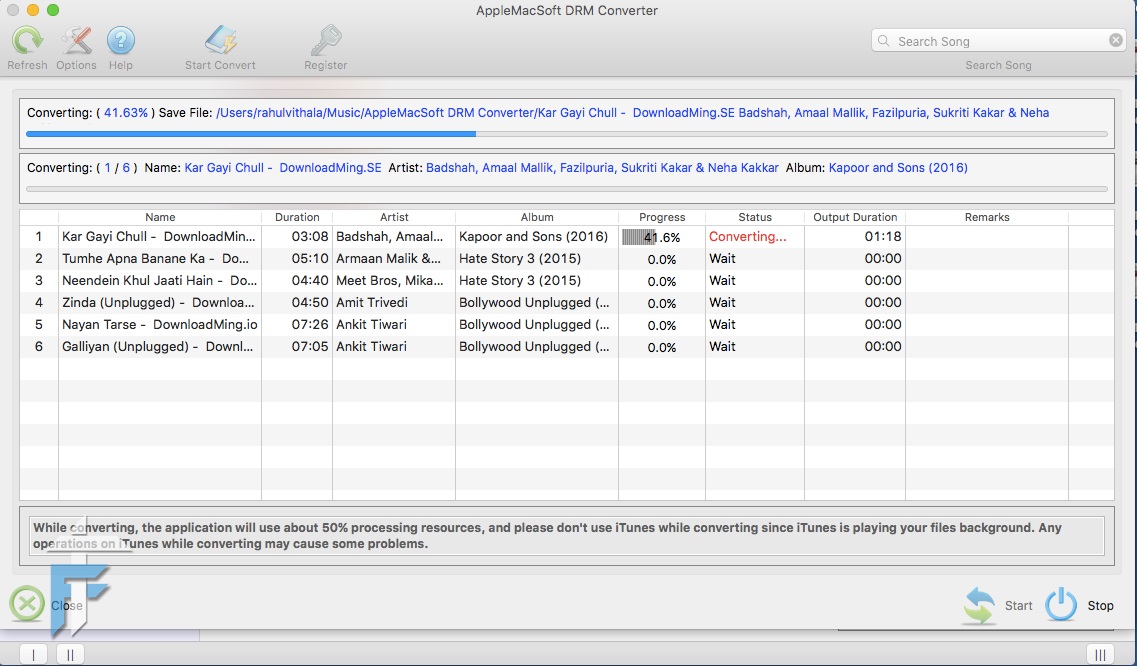
The AppleMacSoft DRM Converter will now start converting the music files to the MP3 format by removing the DRM protection. You can see the progress of the process in a window. After the process completed, check the output folder for the MP3 files. The DRM protection of the purchased iTunes songs removed now, and you can enjoy it on any devices as you like without any restrictions.